

Choose hot foil when you need tactile depth, embossed detail, or reliable results on uncoated and textured stock. Choose cold foil when you need inline metallic colour effects, faster turnaround, and lower per-unit cost on bigger runs. A3m works with both processes daily and can help you test the right one before you commit to a full production run.
TL;DR:
- Hot foil provides a deeper, more reflective metallic finish and is more reliable on uncoated, textured, or fibrous stocks, making it ideal for luxury packaging.
- Cold foil allows for inline processing, quicker turnarounds, and the ability to overprint colors, but performs poorly on uncoated or absorbent stocks.
- Die costs and lead times significantly impact hot foil economics on short runs, while cold foil offers faster setup and lower per-unit costs for larger volumes.
- Combining hot and cold foil in one job is feasible and often used to balance visual impact with cost efficiency, typically with a hot foil logo over a cold foil background.
- Choosing the right process depends primarily on substrate type, run length, and design complexity, with thorough testing on actual stock advisable before full production.
Table of Contents
- Hot foil vs cold foil: the core differences at a glance
- How does hot foil stamping actually work?
- How does cold foil printing work in practice?
- Which stocks and artwork rules suit each foiling method?
- What do tooling and run length do to cost and lead time?
- Can you combine hot foil and cold foil on one job?
- How did we specify foiling for a real packaging brief?
- How do you choose between hot foil, cold foil, and hybrid?
- Why “just pick the cheaper option” is the wrong question
- Get technical support for your next foiling project
- Sources
Hot foil vs cold foil: the core differences at a glance
The mechanical difference decides almost everything else. Hot foil uses a heated metal die, pressed under pressure directly onto the substrate, to transfer foil in a single strike. Cold foil works differently: a UV curable adhesive is printed inline, foil is laminated onto that adhesive, then cured under UV light as the sheet moves through the press.
That single distinction drives every downstream decision, from tooling cost to how the finished piece feels under a thumb.
- Process: hot foil needs a custom die and heat; cold foil runs inline with no die at all
- Setup: hot foil requires die-making lead time; cold foil changes over faster, since there’s no die tooling to wait on
- Finish: hot foil gives denser, more reflective metallic and a raised tactile edge; cold foil gives a flatter metallic that can be overprinted in CMYK
- Substrate: hot foil tolerates uncoated and textured stocks; cold foil prefers smooth, coated surfaces
- Speed and cost: cold foil suits higher volumes at lower per-unit cost; hot foil suits shorter runs where die cost amortises less painfully
Neither process is universally “better”. They solve different problems, and the smartest packaging briefs specify the process based on the job, not on habit.
How does hot foil stamping actually work?
A heated die, engraved with your design, presses foil film onto the substrate under controlled pressure. The heat activates an adhesive layer on the foil, bonding it permanently to the surface it touches. That direct contact under heat and pressure is why hot foil delivers superior metallic density and a genuinely raised, tactile finish that cold foil simply cannot match in a single pass.
It’s also more forgiving on stock choice. Uncoated boards, textured papers, and fibrous packaging materials that would cause cold foil’s adhesive to soak in unevenly take hot foil cleanly, because the die transfers foil mechanically rather than relying on surface energy.
- Works reliably on uncoated, textured, and fibrous substrates
- Produces the deepest, most reflective metallic finish available
- Can combine foil and embossing in the same die pass for a genuine 3D effect
- Best suited to luxury packaging, invitations, and premium short-to-mid runs
Artwork discipline matters here more than most designers expect. Reverse type and fine serif fonts can “fill in” under heat and pressure if the die isn’t engineered with adequate stem width, and a competent die-engineer will often add micro-breaks to protect fine detail. Minimum stroke widths, sensible letter spacing, and early conversations with your die-maker prevent expensive reprints.
Pro Tip: Send your artwork for die-engineering review before finalising layout, not after. A die-engineer can flag fine reverse type or tight tracking that will bridge under heat, saving you a second die cut.
How does cold foil printing work in practice?
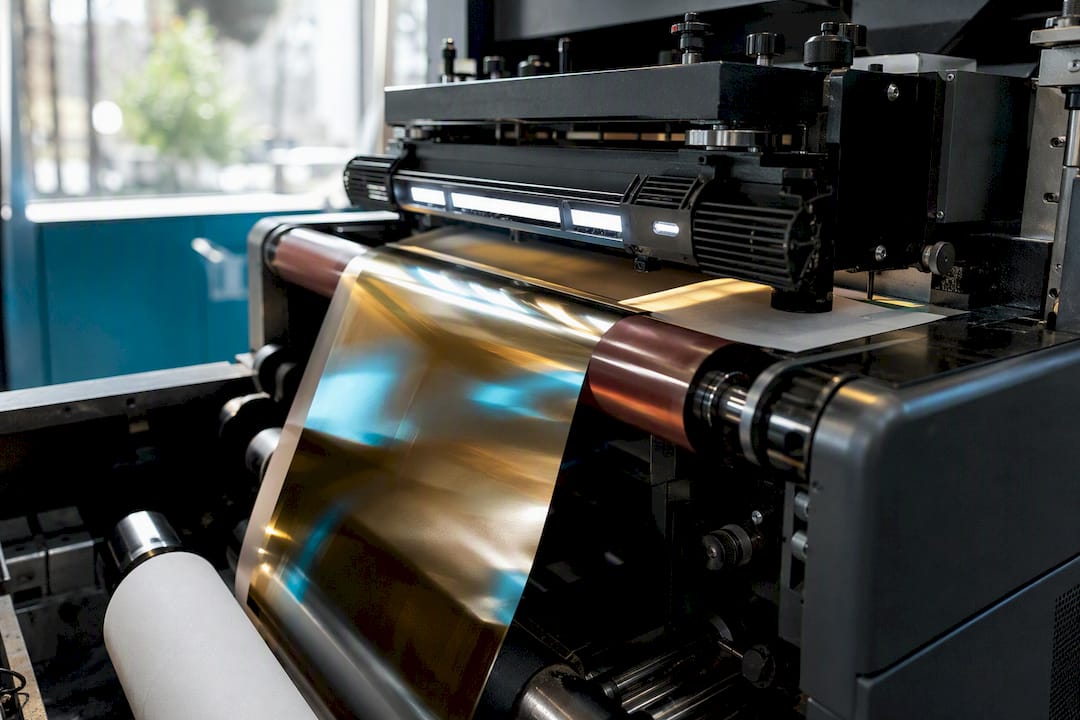
Cold foil skips the die entirely. A UV curable adhesive is printed inline in the exact pattern you want foiled, foil film is pressed onto that wet adhesive, and UV light cures the bond as the sheet continues through the press. Because this happens inline, cold foil supports faster press speeds and eliminates a separate handling stage, which matters when your schedule is tight.
The creative upside is real: cold foil lets you overprint CMYK inks directly onto the metallic base, producing colour-shifted foils, metallic gradients, and halftone effects that a single hot foil pass cannot achieve. That’s a genuinely different creative toolkit, not just a cheaper substitute.
- Runs inline with the press, no separate die pass required
- Enables CMYK or PMS overprinting for custom metallic colours and gradients
- Delivers lower per-unit costs on medium-to-large volumes
- Needs smooth, coated stock for consistent adhesion
The trade-off is adhesion sensitivity. Cold foil performs poorly on uncoated or highly absorbent stocks, where the adhesive can soak in unevenly and leave patchy, dull coverage rather than a clean metallic surface.
Pro Tip: If your stock sits anywhere near the borderline between coated and uncoated, run a small trial sheet before committing. Patchy cold foil on a full production run is far more expensive than a wasted proof.
Which stocks and artwork rules suit each foiling method?
Smooth, coated stocks favour cold foil; uncoated, textured, or heavily fibrous stocks push you towards hot foil. That’s the starting rule, but it’s not the whole brief.
- Check surface energy first. Marginal stocks sometimes need an inline primer or varnish station to improve cold foil adhesion, though this adds process complexity and cost worth weighing against simply switching to hot foil.
- Set minimum line weights early. Fine reverse type and thin serifs need wider stems for hot foil dies; cold foil is more forgiving on line weight but less forgiving on colour registration.
- Isolate foil areas from tight knockouts to avoid bridging in either process, and confirm registration tolerance with your supplier before finalising layout.
- Request a press trial on your exact stock and varnish combination, since testing the real substrate before full production catches adhesion problems no spec sheet will predict.
Pro Tip: Include your actual stock sample with any technical brief, not a generic paper description. GSM alone doesn’t tell a printer how it will take foil. Our guide to choosing the right print finish covers this pairing in more depth.
What do tooling and run length do to cost and lead time?
Die cost is the variable that catches people out. A custom hot foil die is a fixed cost that gets amortised across the run, which makes short runs relatively expensive per unit and long runs far more reasonable.
Cold foil flips that logic. There’s no die to pay for or wait on, so setup is quicker and changeovers between jobs are faster.
- Hot foil: higher upfront die cost, longer lead time, cost per unit falls as volume rises
- Cold foil: no die tooling, faster changeover, lower per-unit cost sustained across medium-to-large runs
- Hybrid jobs (both processes on one piece) carry both cost structures, so budget and schedule accordingly
- Always ask your supplier for die lead time separately from press time; the two get conflated too often
If your run length is genuinely uncertain, that ambiguity itself is useful information. It usually points towards cold foil, or towards holding off on a hot foil die commitment until volume is confirmed.
Can you combine hot foil and cold foil on one job?
Yes, and it’s more common than most designers realise. A frequent hybrid pairs a cold foil background, covering a full panel in metallic colour, with a hot foil logo or wordmark stamped on top for tactile emphasis. This combination balances cost against visual depth rather well: the expensive, high-impact element gets the die treatment, while the broad metallic coverage stays cheap and fast.
Separate embossing passes are sometimes unavoidable, particularly when the emboss depth needed exceeds what a single foil die can deliver alongside the foil transfer itself.
- Specify which elements need hot foil versus cold foil clearly in your brief, not just “add foil”
- Request registration proofs between passes, since misalignment between cold foil backgrounds and hot foil detail is the most common hybrid failure
- Ask for scuff and adhesion testing on the finished combined sample, not just the individual processes
- Weigh the visual uplift against the added complexity honestly; not every brief needs both
How did we specify foiling for a real packaging brief?
A recent brief called for premium gift packaging on an uncoated, lightly textured board, with a short run and a strong emphasis on shelf presence. Cold foil was ruled out early because of the substrate; the texture would have caused patchy adhesive coverage.
The board’s texture made the decision for us before cost even entered the conversation. Hot foil gave us clean, dense metallic coverage and let us combine the logo strike with a light emboss in the same die pass, which is exactly the tactile cue premium packaging needs to earn a second look on shelf.
Steve, who leads production decisions like this at A3m, tested the die on sample stock before committing to the full run, catching a minor bridging issue on fine type early enough to correct the die engineering without delaying the job.
How do you choose between hot foil, cold foil, and hybrid?
Three questions settle most specification decisions before you touch a supplier’s order form.
- What’s the substrate? Uncoated or textured stock generally rules out cold foil; smooth coated stock opens both options.
- What’s the run length? Short, premium runs tend to favour hot foil despite die cost; medium-to-large runs favour cold foil’s per-unit economics.
- Do you need tactile depth? If the brief demands a raised, embossed, or richly dimensional finish, hot foil (or a hybrid) is the only route that delivers it convincingly.
Once you’ve answered those three, ask your supplier for the specifics that actually prevent failed runs: a physical proof on your exact stock, adhesion testing if you’re near the coated/uncoated borderline, honest die lead time (not just press time), and scuff resistance testing if the packaging will see handling in transit or on shelf. A supplier who hesitates on any of those four questions is one you should be cautious about handing a full production run to.
Why “just pick the cheaper option” is the wrong question
Most briefs I see treat hot foil and cold foil as a straight cost comparison, and that’s the wrong frame entirely. The real question is whether the substrate and the tactile requirement even leave you a genuine choice. Half the “which foil is cheaper” conversations I’ve been part of evaporate the moment someone checks whether the stock is coated. Get the substrate test done before you get quotes, not after.
— Steve
Get technical support for your next foiling project
A3m runs specialist foil and finishing work alongside our large format print manufacturing, which means hot foil, cold foil, and embossing decisions get made by people who handle the die trials and press runs directly, not passed through a broker.

If you’re specifying a packaging, POS, or branded print job that needs foiling, send us your artwork, intended stock, run length, and the finish effect you’re after, and we’ll advise on the right process before you commit to tooling. Uncertain about substrate suitability? Our team can run a proof on your actual stock rather than a generic sample, which is the single best way to avoid a failed press run. Explore our large format print manufacturing capabilities or get in touch to request a technical consultation and proof for your next foiling project.
Sources
For deeper technical detail beyond this comparison, the sources referenced throughout cover the mechanics and economics of both processes thoroughly: INX International’s guide to foil techniques, Arkay’s packaging foil stamping resource, Robus India’s comparison of key differences, and Crateform’s hot foil versus cold foil breakdown. For substrate selection specifically, our own guide on product packaging print and design partners like Branded Agency’s print and packaging design resource are worth a read too.
- Mastering the Art of Foil Printing: A Complete Guide to Hot and Cold Techniques
- Foil stamping for packaging: Hot foil vs. Cold foil
- Hot foil stamping vs cold foil stamping: Key differences
- Hot foil vs cold foil